Showing posts with label the crafters workshop. Show all posts

Wednesday, September 25, 2019

How I Choose between Light & Regular Modeling Pastes

I love using all different kinds of pastes for my art. It adds dimension and texture. There are many different texture pastes out there but I generally always use two.  TCW's Light & Fluffy and Regular Modeling Pastes. They are quite different from each other. 

How I choose? I ask myself do I a solid or porous paste. To understand, please read I've explained their differences below:

TCW9004 Light & Fluffy Modeling Paste dries porous. It's full of tiny holes that hold color. I like to use it when I want saturated color because it all soaks into the paste. When it's dry, I use either a paint brush or a spray of water to re-wet the surface to add color. Too much water or paint it will lose the stencil shape. It turns into mush.

TCW9004 Modeling Paste dries solid. The paint, unless you mix it in the paste, will stay on the top of the paste. It doesn't soak into the paste. I love to use this when I'm using lots of paint. When it's dried completely it stays solid and doesn't lose its shape when you add lots of paint.

Here is a TCW Design Project where I used both pastes. The tree (TCW866 Cypress Tree) I used Light & Fluffy Modeling Paste but the landscrape in the scene is Modeling Paste. I wanted to use Light & Fluffy on the tree because I wanted saturated color. 


Do you use modeling pastes in your art? What is your favorite one to use? I would like to know.

If you want to see how I created this piece, head over to The Crafters Workshop blog.

Thanks so much for stopping by!


Friday, September 20, 2019

Design Team Project: The Crafters Workshop

I thought I would share a TCW Design Team project from August. It's a simple canvas but it's amazing how one small addition can change finish the project.

I thought I was finished but it was missing something. Just the addition of the bees was all it needed.


You can see how I created it by going the THE CRAFTERS WORKSHOP BLOG.

The Crafters Workshop provided me with stencils and mediums to create this project. The opinions I share are solely my own because I do love to use them.

Thank you so much for stopping by!


Friday, August 16, 2019

How I Created a Bee-utiful Canvas

I'm up on The Crafters Workshop blog where I created this canvas.


Here is my special tip for this project. When you are using a large canvas on a small substrate, move it around and find part of the stencil that fits the best.

You can read how I created this canvas by clicking HERE

If you read this far, thank you so much. 


Thursday, December 27, 2018

Make It Artsy - The No See-Ums Get You Every Time!!!!

I still can't believe it but I filmed two segments for Make It Artsy. I did it!!!! For those who do not know it's an arts and crafts show hosted by Julie Fei Fan Balzer of Balzer Designs which appears on TV with your local PBS channel, online MakeItArtsy.com , and YouTube.  You can also find them on Facebook, Pinterest and Instagram.

As soon as I received the email I had to read it twice. I first thought they had wrong person but my name was right there. I was excited, shocked and petrified. I've never even taught a class before so how could I even do something on TV?  Something inside me said YES go for it and I did.

Doing things out of your comfort is a scary thing for everyone. It's the no see-ums that are scary. All my thoughts running rampant in my head wondering what was going to happen really screwed me for sure.

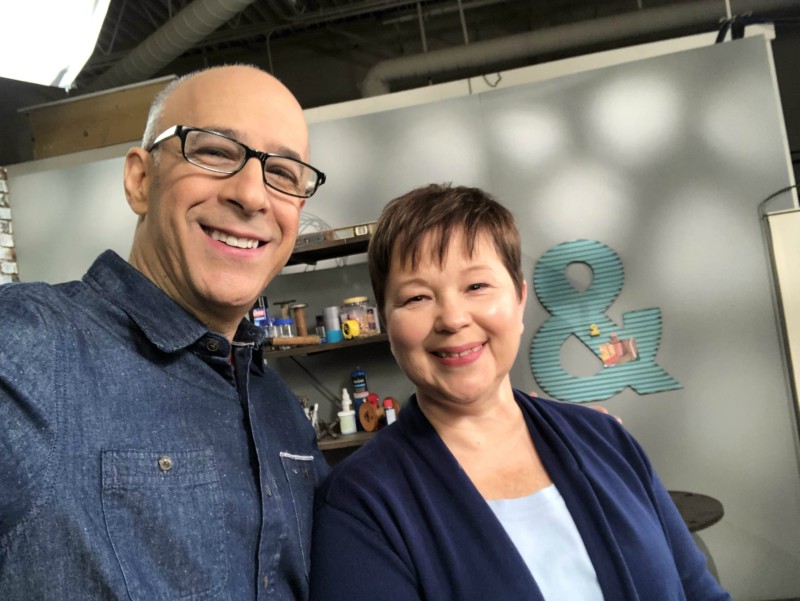
This is what the studio looks like. All those cameras, lights and no see-ums was a little overwhelming.  After I filmed my first segment I realized that my no see-ums in my head were pretty much nonexistent.  Everyone in the studio was so friendly and welcoming. Julie...she's so good. When I couldn't come up with a word she was right there continuing the conversation so it made it easier for me to keep going without looking like an idiot. LOL 


The best part were these wonderful artists. They are so down to earth, friendly, so nice and really helped me to stay as calm as I could be.  They have appeared in the show before so it was nice to hear their feedback and tips.


Cat Kerr and Joe Rotella   (I close my eyes when I'm nervous. I need to practice!!!)
 
 
I was so nervous I hardly took any pictures. Thank you to Seth for taking this one which was my first segment I filmed. Yes, my eyes are closed. They are probably closed in all the pictures.


My second segment went so much better. I was more relaxed and having a little more fun. I'm not sure I want to see myself . I will keep you posted on the date it will air.

Overall it wasn't as bad as I thought it was going to be and it was a great experience. All those thoughts in my head never came to be. I'm hoping the next situation outside my comfort zone I'll think about this day and realize those no see-ums just don't exist.

Have you done something outside your comfort zone? Inquiring minds want to know!

Thank you for stopping by! I truly appreciate it.


Monday, November 26, 2018

Rebekah Meier's Paper Art Collage Techniques BLOG HOP!!!

Welcome to Paper Art Collage Techniques Blog Hop! 

Today we are celebrating Rebekah's new book Paper Art Collage. It's a fantastic book. You can read all about it here at:


At the end of this post you'll find all the other artists joining in on this blog hop. Go check out their projects! 

The one technique that spoke to me is the Creating a Stencil Resist on page 24 of Rebekah's new book. It was a lot of fun to create. 

I used Rebekah's Mixed Media Art Paper and her stencil from The Crafters Workshop Distressed Lace (TCW803). I created this on a 3x3 block of wood. Rebekah's technique was easy to follow with picture step outs. 


As you can see about it creates a gorgeous background and her mixed media paper is adhesive-backed so it's easy to put it on anything.

Here is what I created to finish my project.


 I added her stencil design to all the sides too.

Rebekah's new book is fabulous and has tons of techniques with easy to follow instructions. 

Check out everyone's projects created using one or more of Rebekah's techniques from her new book.


Again you can find her new book HERE!

Thank you so much for stopping by!


Tuesday, October 16, 2018

on my mind, out of my mind, oh no my mind

Welcome to another post when I'm feeling out of my mind. I have a hard time transitioning to fall. I love summer even the hot and humid days. The only thing I do like are the colorful leaves. They are just starting to show themselves.

I work for a tax accountant and I start prepping for that horrid tax season in November. I think that's why I have so much anxiety for fall. I'll be busy from November through to April 15th. Also, I hate the cold.

In the fall my art is sort of a mess. I look at it and wonder where my head is at. So out of my mind is correct. To keep my mind focused I work like to work in mixed media collage. It keeps my mind and hands busy with little pieces of paper trying to make it work. I don't know why it's calming for me but it works.

This piece is called Many Moons. Here is a picture of my auditioned papers. I spend quite a lot of time auditioning pieces and sometimes they just don't work and I'm diving into my box of scraps looking for something else.


The long strips are dried wet wipes. I keep them and use them in collage all the time. I have quite a stack.  Some are a form of polyester plastic so I figure with gel medium they will last quite while and not disintegrate.

Here is the finished piece. Its hard to photograph because of all the metallic on it. What you think is white is silver.  I also added Seth Apter's Cling Rubber Stamps by Impression Obsession called Border Lines.  I'm obsessed with this stamp!


Another thing I've been doing to keep my mind focus is color. Every time I use a stencil I spray it with water and put it down on paper. I keep going on one piece of paper until I like the way it looks. When it's all dry I put it away to use another day.  Fall is here so now I'm pulling them out and coloring them in with watercolors. I'm not a fan of watercolors so in an effort to change my mind about them I try to use them.


Fall makes me feel like I have to squirrel away all my nuts for the winter and get everything in order so working on collage and coloring in a page like a coloring book keeps my mind at peace. Well, maybe for a short time!

Thanks so much for stopping by!
 

Tuesday, October 9, 2018

A Bouquet for her Wedding

Hi Everyone! My sister got married a few weeks ago. For her shower I creating this 14 x 24 wood panel for her.


It took me one full weekend but a couple of hours each night after work to finish it. Although I used stencils for the flowers, I did not use the whole stencil design in one spot. I added flowers with paint and I also added flowers with TCW Light & Fluffy Modeling Paste. 

Each part of the design that I added with modeling paste, I had to wait for it to dry before adding more. That's why it took so long. TCW Light & Fluffy Modeling Paste dries fast if you put it in front of a fan. Don't use a heat gun unless you want the paste to look bubbled. 

TCW Light & Fluffy Modeling Paste is porous so when you add a little water and then add paint it's reactive. The paint will spread through the paste.  I think that's why it's my favorite. Its like magic!

The Crafter’s Workshop provided me with stencils and mediums to create this project. The opinions I share are solely my own because I do love to use them.

Here is a close up of some of the flowers.


I'm currently working on two more right now. Very different from each other and this one. I'm creating paintings for a Breast Cancer Fundraiser called Scraptoberfest.  Everyone buys as many tickets as they want for all the raffle prizes to get a chance to win something. It's an all day event, breakfast, lunch and dinner included.  I don't scrap but I bring stuff to make cards or work in an art journal.   100% of the proceeds go towards those who need wigs, prosthetics, rent, electricity, etc.

If you want to see step out pictures of this wedding bouquet you can hop over to The Crafters Workshop Blog to see it.  I also listed all the stencils I used for this project.

Thanks so much for stopping by and reading this far!
I greatly appreciate it.


Tuesday, September 11, 2018

on my mind, out of my mind, oh no my mind

Welcome to another episode of My Mind!  I traveled a lot in August and I'm still trying to get my art mojo started.  Do you have that issue?  If I'm out of my art room for an extended period of time I just can't get going again. 

Everything I do I hate and just paint over. In fact, I ripped out an art journal page and threw it away. I started to get a little bit focused this weekend.  OR I tried. Sometimes I feel like I love creating to many projects in many different mediums that I can't decide what to do first.

This little 3x3 piece of wood had a great background.


Then I did this to it. What was I thinking!!!!!  Or maybe I was thinking to much.


I did create this on a piece of 11x14 mixed media paper but I didn't like it.


I did create this which turned out okay.


After a while I just get frustrated and have to walk away and regroup. So I love to play on SnapChat and a in photo app called PhotoLab.


The second mermaid is my daughter.


Lately, I feel like I'm out of my mind. My hands and brain won't work together. I think I'm heading into my art journals again. I think its time to play with Mermaid photos!  Don't you?
 
Thanks for stopping by!


Tuesday, August 28, 2018

TCW Gel Medium Gloss - When it Dries You Can See Right Through IT!

Hi Everyone.
Today I have a small Feather Abstract to show you. It's 5"x7" and I even have a few step out pictures.  I'm creating a Semi-Transparent Journal and this is a piece of that plastic I'm using.

I started out by using a brayer and adding paint to the background.  While the paint was wet I put a stencil on top and wiped away the paint. Sorry I don't remember which stencil I used. It was from The Crafters Workshop.

The Crafter’s Workshop provided me with stencils and mediums to create this project.
The opinions I share are solely my own because I do love to use them.


Then I added a stamp to the background with Archival Ink. The stamp is an old unmounted stamp and I do not know where it came from.
 
 
Here is where the fun happens. I added the feathers from TCW389 Fancy Feathers with TCW Gel Medium Gloss.  As you can see its white while its wet.
 
 
 BUT when it dries it's crystal clear.  I added some titanium white Golden High Flow Acrylic around the leaves.


Here is the finished piece.  I'm in love and will be making more of these.
 
 
I hope you try some TCW Gloss Gel Medium. It's so much fun to work with. Can you imagine all the possibilities?
Thank you so much for stopping by!

Tuesday, August 21, 2018

A Beautiful Bouquet

Today I'm sharing a Design Team project for The Crafters Workshop. August 1 starts with the new design team and new stencils.  Make you check out all the TCW new team and their creations!

I created an easy piece of art using TCW823 Rose Bouquet and TCW Light & Fluffy Modeling Paste.

The best part about TCW's Light & Fluffy Modeling Paste is that you can let it dry, add water with a brush and add a touch of paint and it will spread through the paste. I usually use high flow acrylics or add water to paint for this technique. I wouldn't wait a few days to do it. I've found the longer it sits it no longer reacts with water very well.

You can see the whole tutorial HERE.


The Crafter’s Workshop provided me with stencils and mediums to create this project.
The opinions I share are solely my own because I do love to use them.

Thanks so much for stopping by! Don't forget to head over the The Crafters Workshop Blog to check out what the rest of the Design Team created!
Tuesday, July 31, 2018

Where do you find a PINK OCTOPUS?

I found one here on my tag. Couldn't resist creating one with an unusual color. Who knows maybe there are pink ones in this world!!!

 
The Crafter’s Workshop provided me with stencils and mediums to create this project.
The opinions I share are solely my own because I do love to use them.
 
 
To create it I used TCW781s Scrollwork on the background. I love to roll on the color with a brayer, take off the color through the stencil with a baby wipe, dry it, and then add more color and more wiping. Just layer upon layer.
 
Next I added the Octopus (TCW607s) and while I was waiting for it to try I added TCW568s Moving Vines.  When everything dried I painted it.  
 
That's it. Pretty simple and colorful. This one is going to my art sister Sherie!!!
 
Thank you so much for stopping by!
 

Tuesday, July 10, 2018

I Framed a Sunflower!!!

Well, not a real one. One of my favorite stencils from The Crafters Workshop is the Joyful Sunflower. Although I have quite a few favorites the flowers are the ones I use all the time. Today I'm going to show you my Design Team project for The Crafters Workshop.

The Crafter’s Workshop provided me with stencils and mediums to create this project.
The opinions I share are solely my own because I do love to use them.

I want to show you the fun background I created for this piece. It is something everyone can do! I found I had a box of pre-made corrugated cards so I thought it would be fun to use the card for mark making and texture. If you don't have the cards use cardboard or anything corrugated!

I took a piece 11" x 14" mixed media paper and added paint to it, sprayed it with water lightly, and then used the card to create the marks.  Keep move the card around the paper.


Since I have a whole box of these cards I will be using this technique over and over. For the background I used blue, white and black acrylic paint. I believe they were all Golden Paint but I can't guarantee it since there are always tons sitting on my table. I wish I could use just one brand. Do you only one brand of paint?

The background dried and I started adding the Joyful Sunflower. Remember to move your stencil designs around especially flowers. You'll see I created shadows behind the flowers by moving it.


I finished the piece and framed it right away. I'm in the process of varnishing paintings I want to keep and painting Gesso on the ones I don't want so I can start over.


You can see more of my tutorial on The Crafters Workshop blog. Don't forget to leave a comment and check out all the other projects created by the Design Team!!

Thanks so much for stopping by!

Tuesday, July 3, 2018

Forgetting My Creations

I keep forgetting to share my Design Team projects for The Crafters Workshop here. Today I'm going to share a few projects with links to the tutorials so you can see how they were made. You can see the tutorials by clicking on the date.    Lets get started!

MAY 15, 2018:

MAY 1, 2018: This is a quick and easy technique to create backgrounds


APRIL 17, 2018


APRIL 3, 2018 - Tea Bag Art


MARCH 20, 2018


The Crafters Workshop provided me with stencils and mediums to create all these projects. The opinions I share are solely my own because I do love to use them.


That's it! I'm all caught up. I hope you enjoy my tutorials and check out the rest of the Design Teams' projects.

Thanks so much for stopping by!